
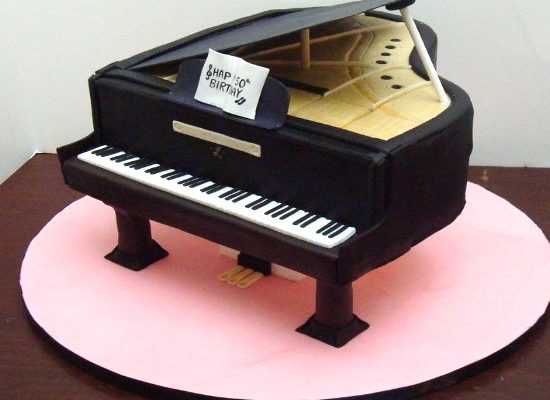
This baby grand piano was made to serve 30 people but you can add or subtract the amount of cake based on what you need. Be careful on subtracting too much though because you want the cake to look proportionate to what a piano should look like. Its better to have too much instead of not enough. This is my first attempt at making an elevated piano. Im sure there may be alternate methods for doing these steps but this is the way that worked for me. Ill also include any tips that I learned along the way.
Instructions:
- To begin with, you will need to go to a craft store and buy the pegs for the legs of the piano. I found mine in the woodworking section and then I had to paint them black. A small piece of styrofoam will hold them upright and make it easier to paint them. You dont have to worry about the type of paint you purchase because the legs will never come into contact with the cake.
- Also purchase two styrofoam boards (1/2 thickness) sold in the art section.The board will be approximately 30 x 36 in length. You will need to cut two pieces one will be the shape of the piano and one will be for the entire cake will sit on.
- To give me something to refer to, I also purchased a small baby grand piano in the section that sells doll furniture.You dont need to do this but it is helpful when creating the cake.
- Draw the shape of the piano onto the foam board. This will be the base of the piano (and keyboard) and will need to be big enough for the cake to sit on. Use a pencil because you may have to draw and redraw . . . unless drawing comes easily for you.
- Using an X-acto knife cut out the base and cover the board with black food safe paper.
- Using the covered board as a template, outline the board onto a piece of cardboard.This will be needed to cut the cake in both directions. Ill come back to this later but for now, just create the template at this point. You will also need a second template (the brown one below) to use for the piano top.
- Cutting the main board – Before cutting the main board, use the piano shaped board (that you just covered) to see how the piano will sit on the main board. Its better to have a little extra around the edges to prevent damaging the cake later. Cut and cover the board in a color other than black (since you most likely used that for the piano).
- In order to elevate the piano (on legs) you will need a dowel rod a bit larger than the size of the pegs that you will use for legs, a hammer and a hot glue gun.Using the dowel rod and hammer, create an indentation on the bottom of the board. Glue the pegs into the board with a hot glue gun.
- Once the glue has hardened, you can determine where the indentations need to be on the main board.Repeat step 8 on the main board. Be sure piano is level before continuing. Let the glue harden by letting sit for about 20 minutes.
- You are now ready to start the cake.Bake one or two sheet cakes that will be large enough for your template. You will need two cakes, approximately 2 inches tall each.
- Using your template, cut the cake out twice. Stack the cake onto the cake board with filling between the two layers.
- Cut out the area for the keyboard.
- Trim the top edge of the cake to meet the curve along the edge of a standard piano.
- Put a light coat of buttercream on the cake and put in the refrigerator to firm before putting black fondant on it.
- Once the fondant has been placed on the cake, you can put a marbled piece of brown fondant on top to look like the inside of the piano.Use the small template that you made earlier.
- Using fondant, make the keys for the keyboard.
- To make the top of the piano, cover the cardboard with piping gel and then black fondant.Allow to harden before attaching to the top of the piano.Use black royal icing to attach to the piano. You can either make a black piece of fondant to hold the top open or paint a dowel with black food coloring.
- All decorations on piano are made of fondant and music sheets are edible images.
- Make the fondant shine with a light dusting from a steamer.