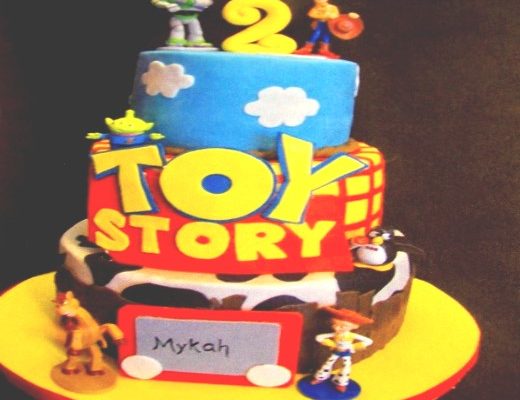
Toy Story cakes are so much fun to make and kids really love them. I received the above picture from a customer (before I closed my cake shop) and made this cake for her. I loved the way the cake turned out so much that I decided to make the cake for my grandson’s 3rd birthday. Take the time to buy the figurines that are displayed on the cake instead of making them because the kids really love to have them to play with after their birthday is over (at least my grandson did).
Several days before you want to have the cake made you should start making the fondant decorations so they can harden before you put them on the cake.
MAKING DECORATIONS
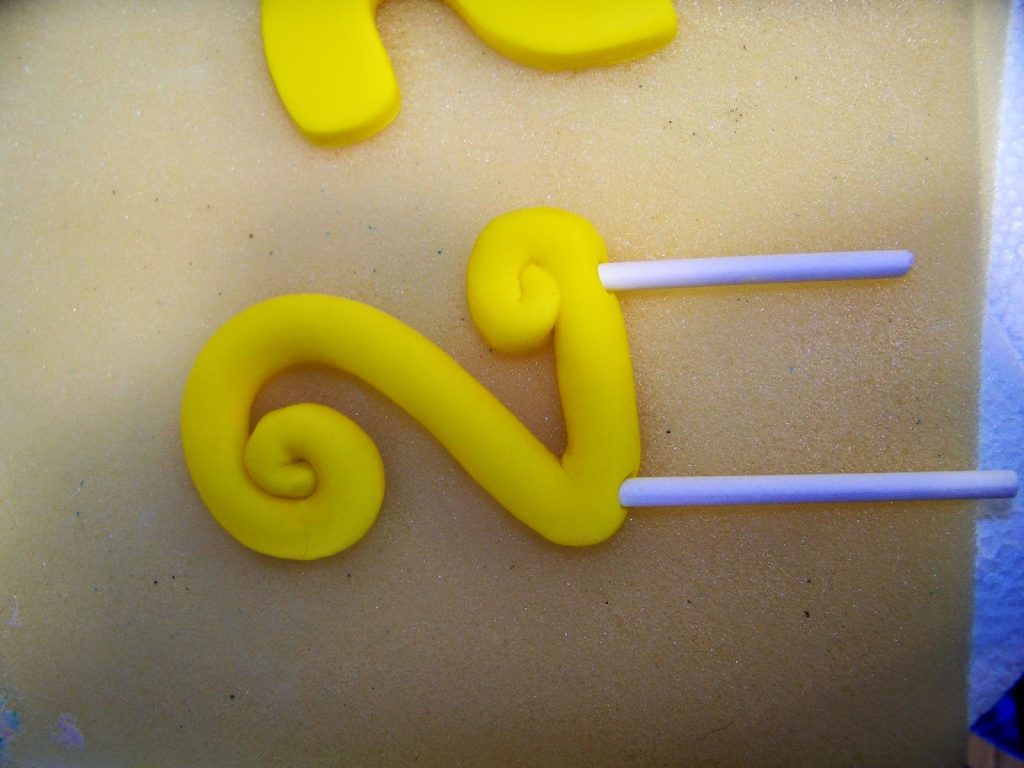
To make the number, roll the fondant in a log shape and curl the ends until you achieve the shape (number) that you need. You may need a little bit of water to get the curl to hold. If the fondant is too soft add about a teaspoon of tylose powder to the fondant (purchased from Michael’s or Hobby Lobby or any craft store that sells fondant). You want to kneed the powder in until it is no longer visible. Once the fondant is rolled into shape, insert toothpicks or popsicle sticks to the bottom of the number so that it will stand on the top of the cake without falling over. You want these to be fairly long but not longer than the cake is tall. Let the number air dry flat on a piece of foam so that it can harden, turning it over periodically.
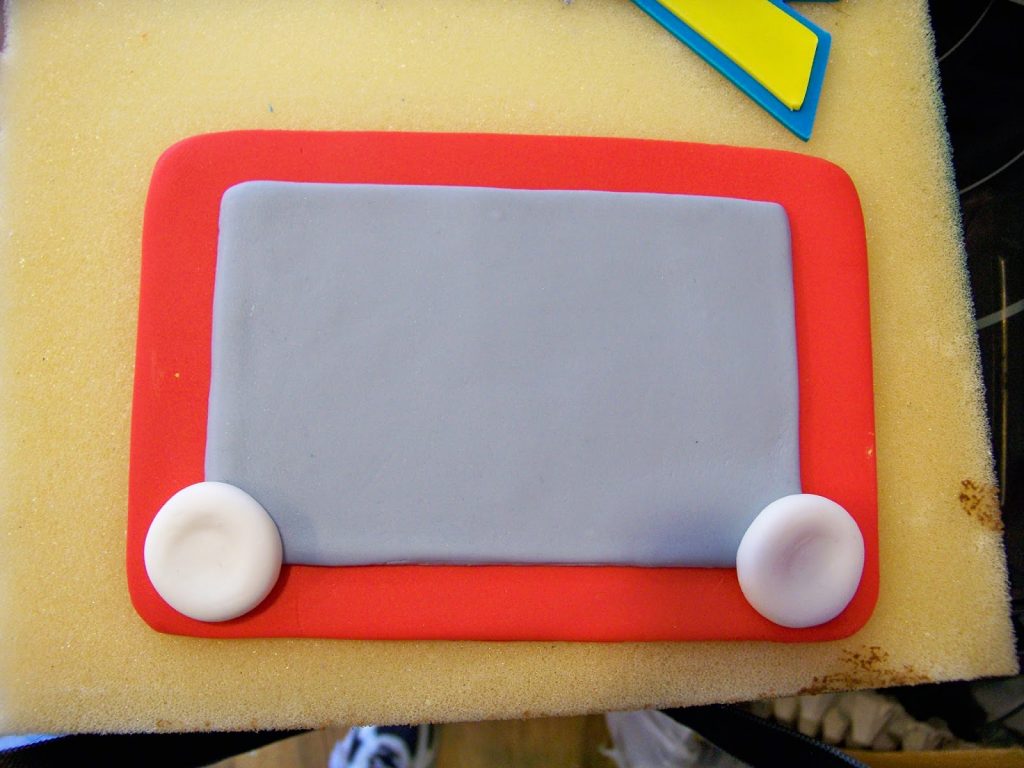
To make the Etch-a-Sketch game, you will need a rectangle piece of red fondant, a smaller rectangle piece of gray fondant and two round pieces of white fondant. You can assemble this wet or wait until each piece dries. I found that it was easier to get the gray centered on the red piece after they had dried. When assembling, use a little bit of water to get the pieces to stick to each other. Once they are completely dry you can write the name on the board. I used edible markers but you can use a regular marker if you don’t let anyone eat it.
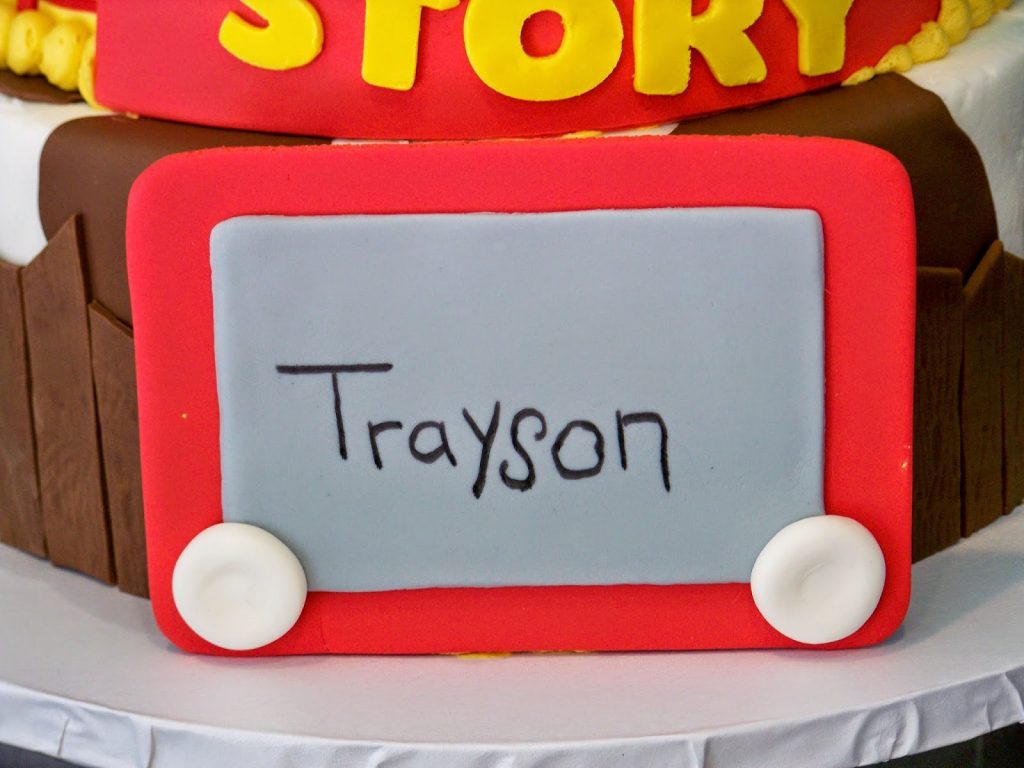
When writing the name, I tried to write it like a child would because the inspiration picture had it that way and I thought it was really cute. You want the finished piece to be about 4-4 1/2 inches tall and about 6-7 inches wide. It should be about as tall as the bottom tier. (Update: I received a great comment from a subscriber that can help you achieve child-like handwriting. She suggested using the opposite hand you usually write with. Great idea! Thanks “Cakeaholics” for the tip!!)
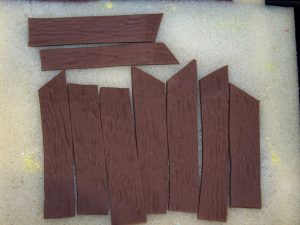
To make the wood fence slats you will need chocolate brown fondant. Roll it out with plastic wrap over the top of it. You want the plastic wrap to be scrunched up in order to get the indentations in the fondant. If you have an impression mat that has the look of wood then that will work also. Once it has the appearance that you want, cut the wood slats in difference lengths and angles using a craft knife. Don’t worry about these being perfect because you want them to all look different. Depending on the size of your cake, you will need to make about 30 or more with each one being around the height of your bottom tier (usually about 4″). You want some to be a little shorter and some a little taller. Let these dry flat on a piece of foam. Be sure to keep some extra fondant handy to make the cow spots on the bottom layer during the decorating phase.

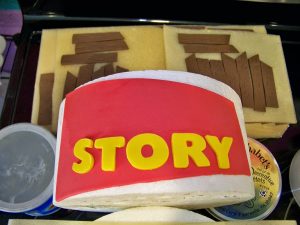
To make the sign I first searched “Toy Story Logo” on the internet in order to get the image I wanted. I then printed it on a piece of paper. There are several ways you can make this sign. If you have a Cricut Cake Machine and cartridge then you can easily cut your fondant with that. If you don’t then you will need to use the image you found on the internet and use it as your template. Cut out each letter/shape and lay it on top of the fondant you have rolled out. Using your craft knife, cut around the template to recreate the shape or letter with the fondant. Needless to say, the sign took me the longest to make because I had to cut out two of “T”, “O”, and “Y” (one in yellow and one in blue) as well as “STORY” in yellow and then the red shape before I could assemble anything. I let all of them harden, individually, before I assembled them. If you want the red portion to fit around the cake then you’ll want to dry them slightly rounded. I had a piece of Styrofoam that worked for me.
The stripes on the middle tier are made with cut pieces of fondant. You will want to do this at the time of decorating so the fondant doesn’t harden too much.
MAKING THE CAKE
To make this cake you want to start with six cakes in three different sizes to make up the three tiers. To have enough room for the figurines I made the top tier a 6″ cake, the middle their an 8″ cake and the bottom tier a 10″ cake.
You don’t want to start decorating until all three tiers have been frosted:
top tier = sky blue
middle tier = yellow
bottom tier = white
Once all tiers have been frosted, let them sit in the refrigerator for about 30-45 minutes to get firm enough to handle without the frosting getting easily messed up. Once firm, go ahead and stack the three tiers. Refer to my previous post (Making A Two-Tiered Cake) for helping with stacking the cakes.
DECORATING THE CAKE
The cakes are now stacked and ready for the decorating to begin. Since all of the decorations are made at this point then you can do this the day or day before the party.
Cow Spots: Starting with the bottom tier, you will want to make the cow prints. Take a small piece of chocolate brown fondant and flatten it out in different directions. This part was fun for me because I just rolled the fondant in a ball in my hand and then flattened it out on the table, pushing the rolling pin in different directions to get a shape. The less you try on this step, the better it looks. Put the spots only around the top section of the tier.
Fence Slats: Once the spots are on the cake, put the wood slats around the tier. You want to keep these fairly close together and different heights next to each other.
Stripes: For the shirt stripes, cut red fondant in sections that you can manage. Starting with the back of the cake, put three stripes around the cake, horizontally. Doing these first will make the rest of the stripes easier. Once these stripes are on the cake then you can do the vertical stripes. Be sure to use one vertical stripe to cover up the spot where you started and ended the horizontal stripes.